SystmOne user set-up guide
Last updated: August 5, 2026
For the GP Automate Bot to access the clinical system, it needs a user profile with the appropriate local access rights. The settings we ask for allow the bot to carry out the activity as well as future-proof its ability to perform key actions in the near future.
Step 1 - New Staff Registration
a) Go to Set up > User & Policy > Staff & Organisation Setup

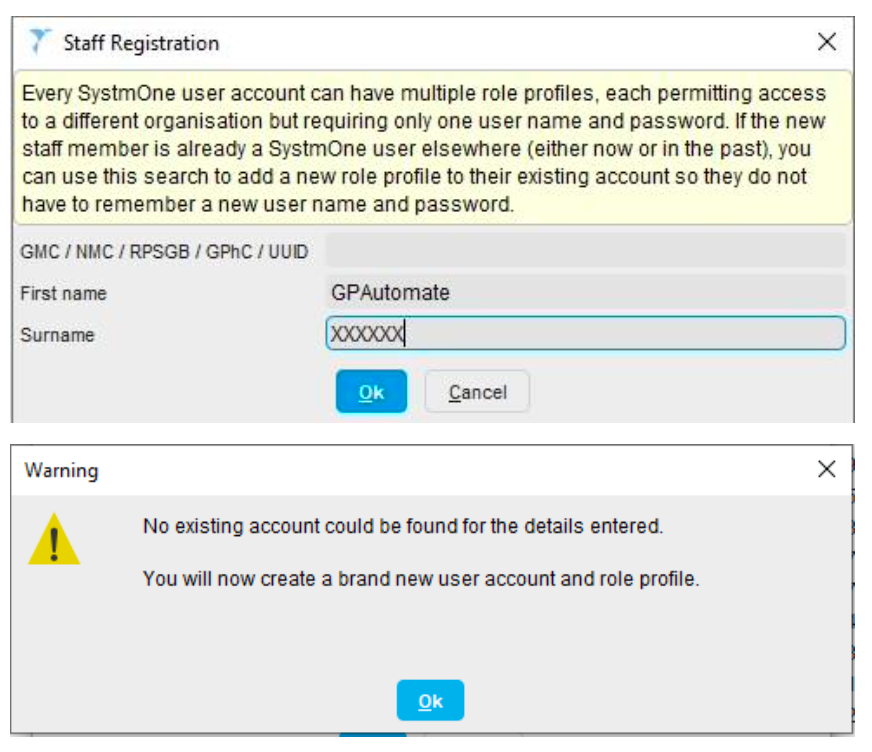
b) Click on New Staff and fill in the following details as shown in the screenshot
First name: GPAutomate
Surname: XXXXXX < use your practice code >
For example: GPAutomateE84003
SystmOne will now try to verify the user against nation-wide user profiles, simply click okay.
Step 2 - Global Settings
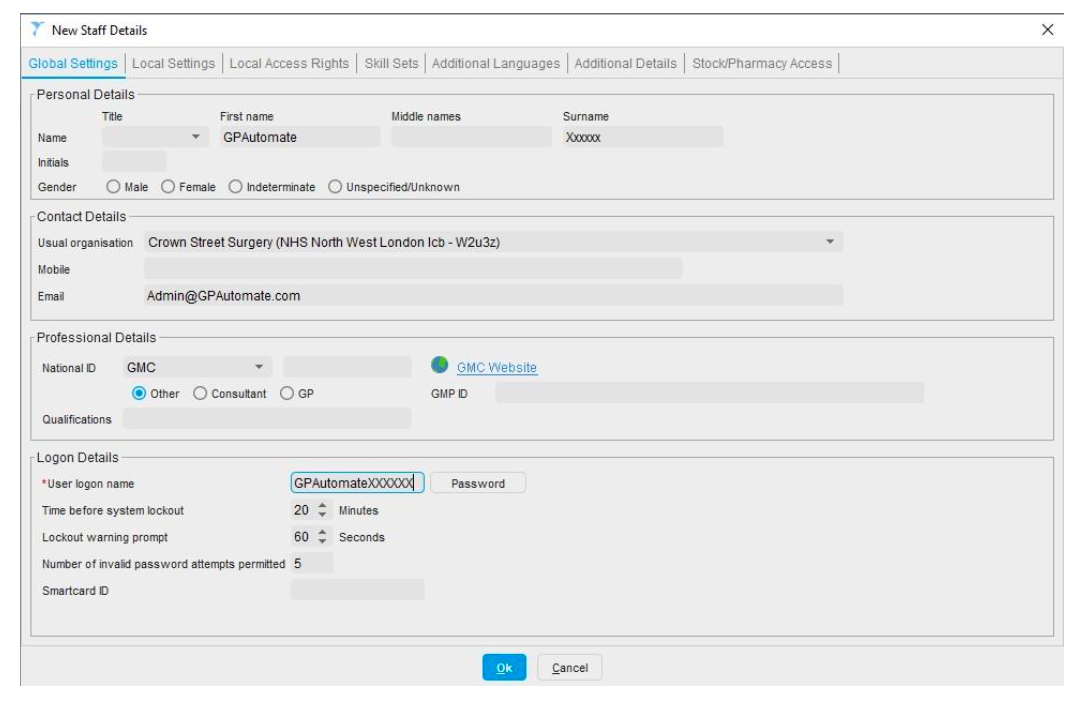
You will be asked to fill in further details in the New Staff Details.
The first settings to complete is the Global Settings, with the following key areas to complete:
First name: GPAutomate
Surname: XXXXXX < use your practice code >
Email: admin@gpautomate.com
User logon name: GPAutomateXXXXXX < note: XXXXXX is your practice code >
Time before system lockout: 20 Minutes
Lockout warning prompt: 60 Seconds
Number of invalid password attempts permitted: 5
Step 3 - Local settings
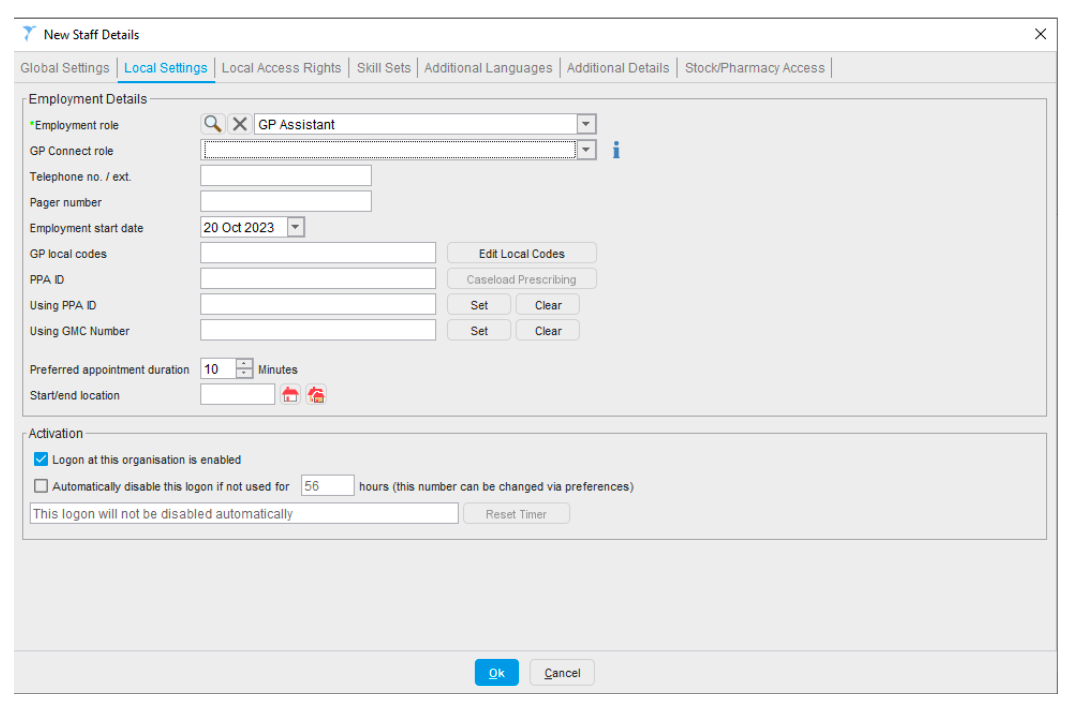
Then click on Local Settings and choose GP Assistance under the Employment Role
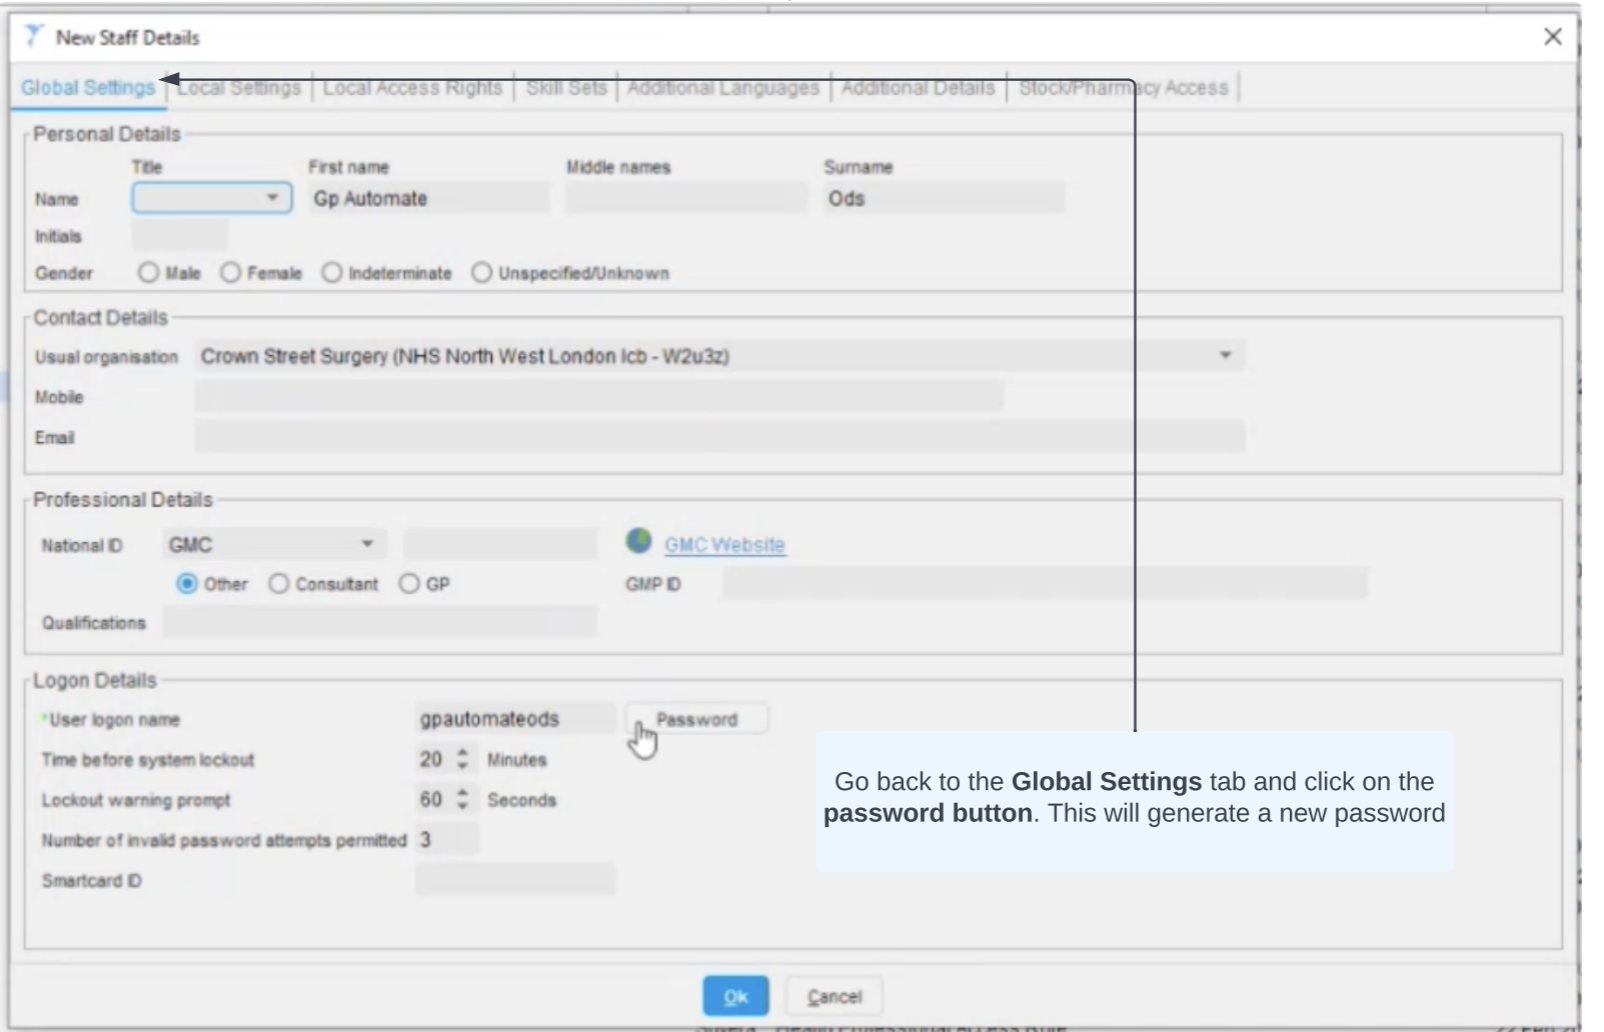
Return to Global Settings and select the password button to generate a new password.
Select change password, then display password
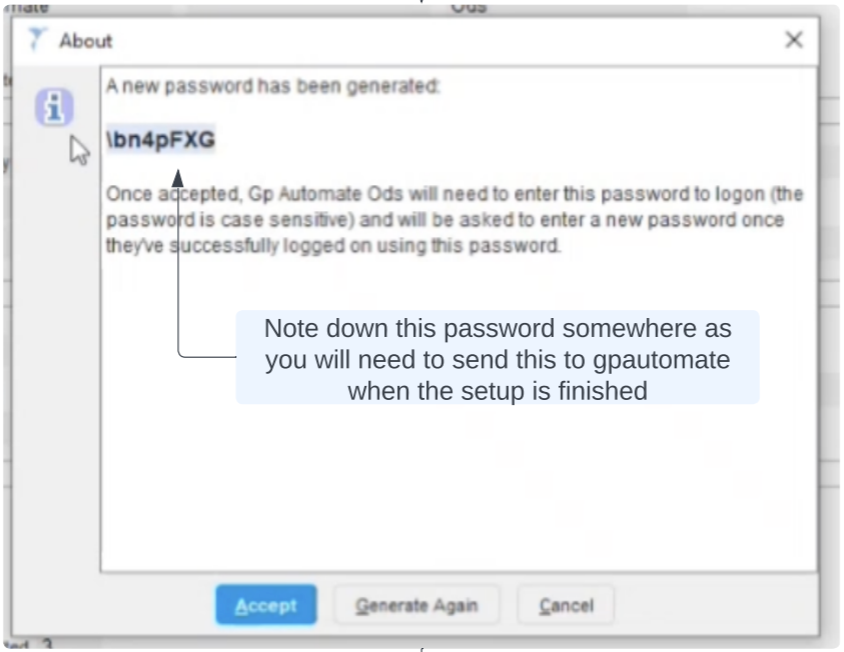
Step 4 – Local Access Rights
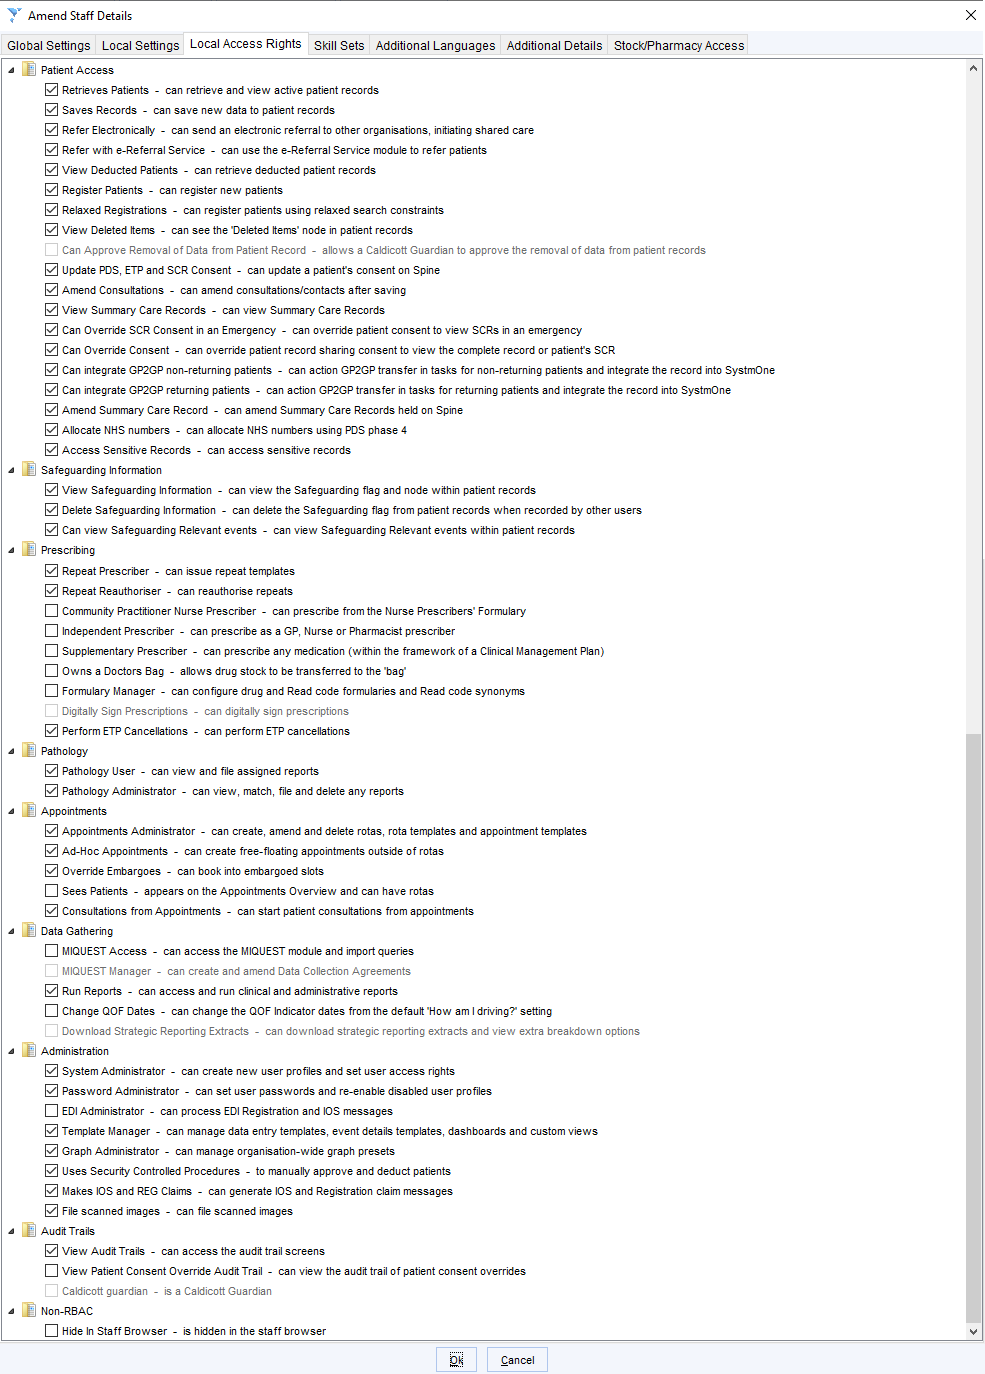
Then click on Local Access Rights and ensure the following access rights are ticked accordingly:
Select all tickable options for Patient Access
Do NOT select any Prescribing options, continue to select options for in Pathology and Appointments
Select all tickable options in Data Gathering, Administration, Audit Trails and Non-RBAC
Step 5 – Setting up your password
Go back to Global Settings and click on password beside the User logon name field
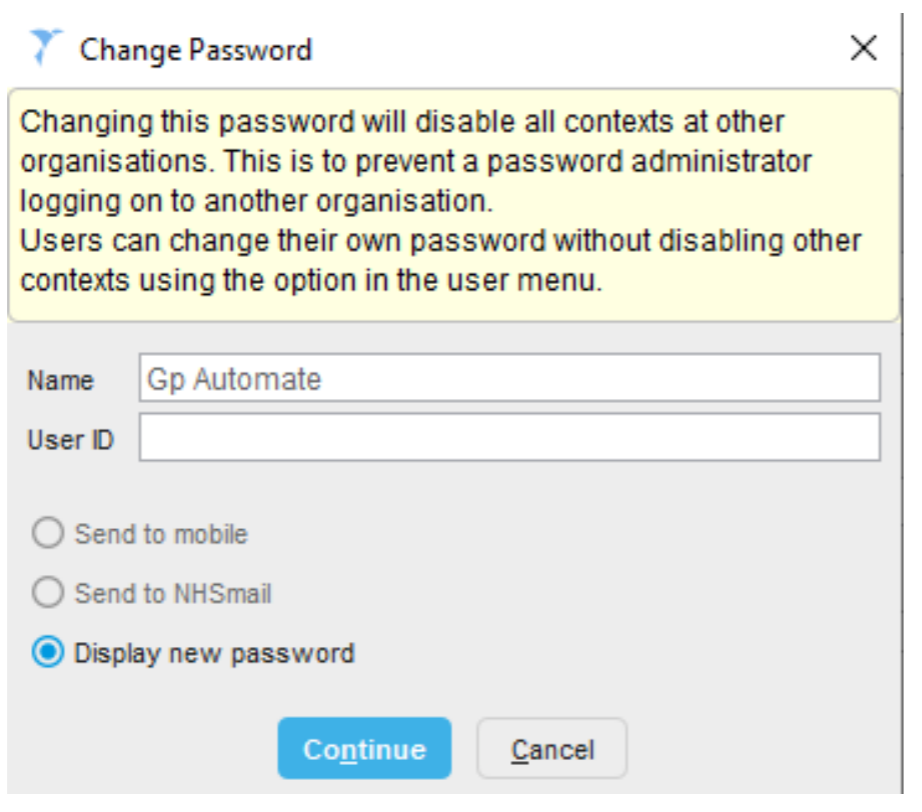
Click on Continue, set up your password, and share this password with us by filling out this form.
Click Okay and the user should be set up and ready to go.